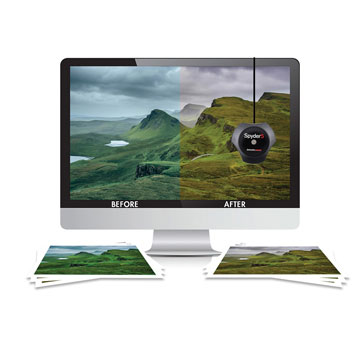
On screen print previewing, or soft proofing, means viewing a preview of how your image will look when printed on a specific printer and paper type.
Soft proofing uses print profiles which can be downloaded from 212 Productions website and installed into Photoshop. There is a different profile for each printer & paper combination we offer. Most images are stored in standard RGB profiles such as Adobe 1998 RGB or sRGB, and soft proofing means converting from these standards to the desired print profile. When you soft proof your image in Photoshop, the software substitutes colours that the printer can’t reproduce on the paper selected with ones it can.
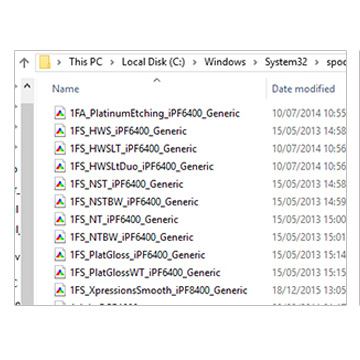
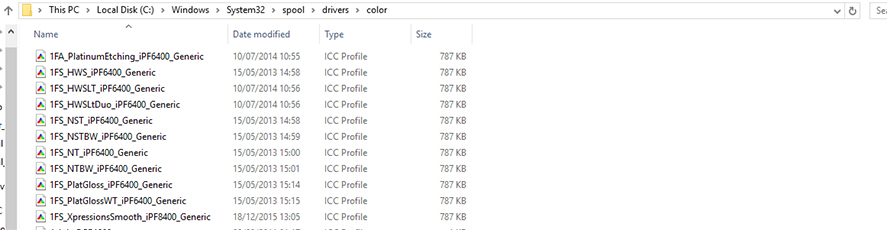
Incidentally, the range of colour that a device can reproduce is called its Gamut, and as the gamut of your screen is larger than the gamut of the printer, the conversion to a print profile from an RGB standard profile will usually result in a certain amount of colour being removed from an image. So, to start the process please go to our website & download the print profiles and save them into the correct folder, which for Mac is here:

and for PC is here:
Now you are ready to soft proof using Photoshop. Firstly, open your image in photoshop. Then:
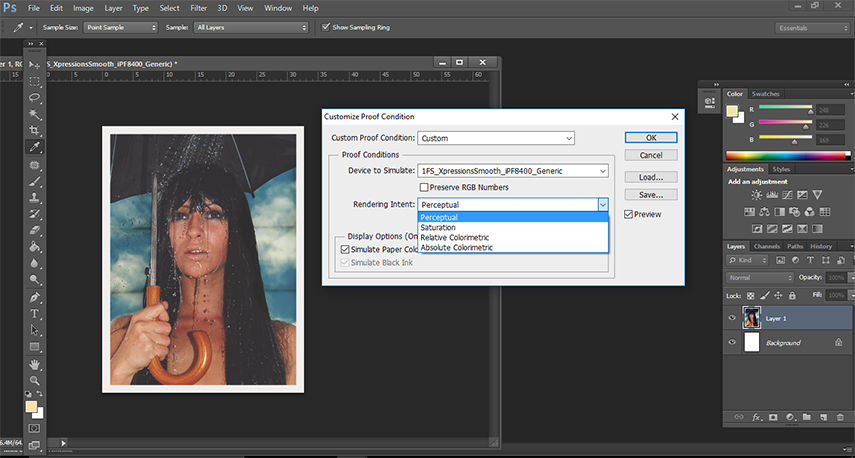
Select View > Proof set-up > Custom. A pop up box will appear entitled ‘Customise Proof Condition’.
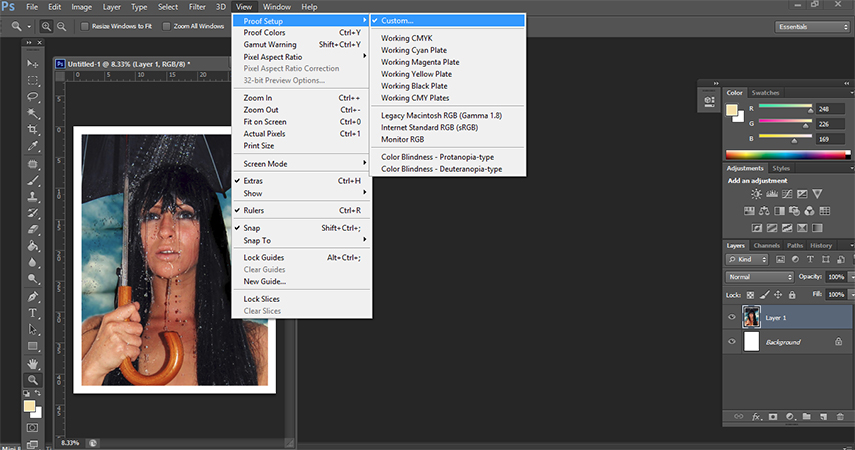
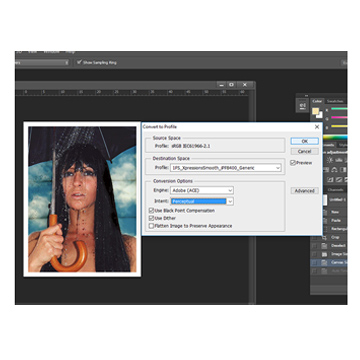
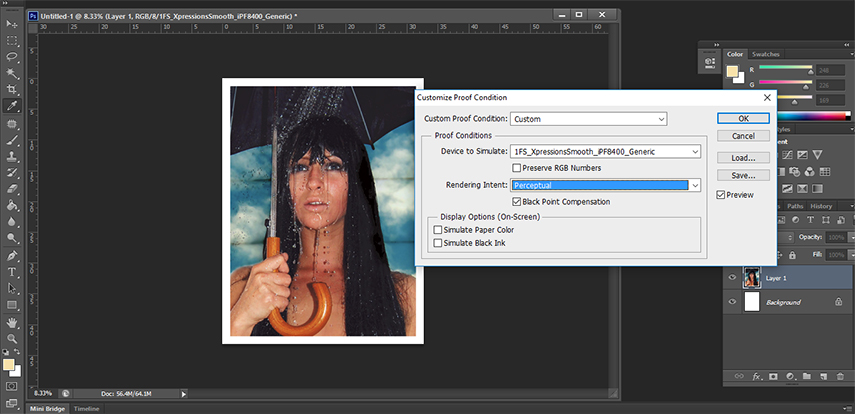
Make the following selections: For Custom proof Condition: select Custom For Device to Simulate: Select the profile that corresponds to the device & paper type you wish to soft proof. For example if we want to print on Studio Expression Smooth Fine Art then select: 1FS_XpressionsSmooth_iPF8400_Generic
Next, select the rendering intent. There are only 2 rendering intents that you should use: relative colorimetric or perceptual.
Perceptual will be better at holding shadow detail but may cause slight tonal shifts across the image, whereas relative colorimetric will hold the exact tone in the image, but conversely may cause a slight loss of shadow detail.
If you are unsure as to which rendering intent to use, why not try out both and see which one gives you the best onscreen result. Next make sure black point compensation is checked, and leave simulate paper type & simulate black ink unchecked.
Ticking the preview box will show the on-screen soft proof, and then un-ticking the box reverts back to the original file. Clicking the preview on and off in quick succession will help you to notice any areas of the image which will be affected by the conversion.
On our example below we have selected ‘review on’:
Once you are happy with the preview or soft proof, and are ready to print you should convert your file to the profile and save it down. This can be done by selecting edit > convert to profile. Use the same settings that you used to preview and click OK.
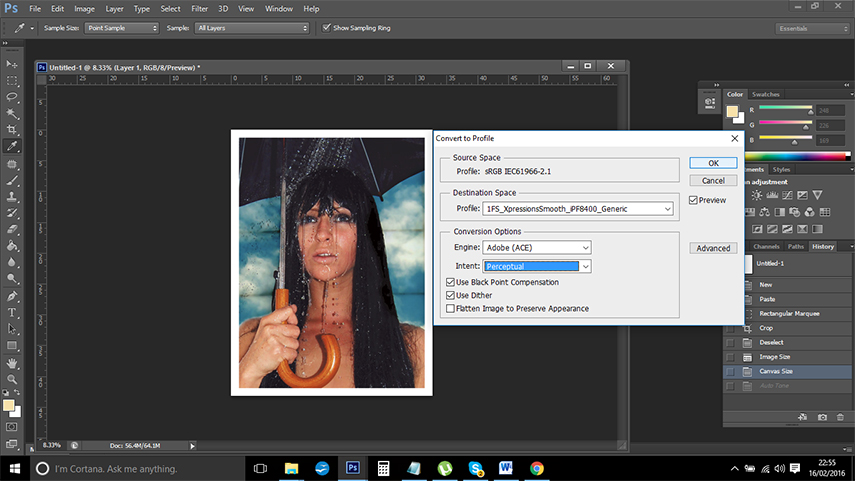
When saving the file remember to rename it so as not to save over the master file, as unlike the soft proof preview, converting to profile is a one-way process. We suggest appending the file name with the print & paper type that has been selected.